Asset Management
The Asset Management page allows you to manage your game assets. You can upload assets, edit them, delete them easily. The UI is designed for you to easily create a standard NFT collection.
Furthermore, you can also map the collection to a specific Smart contract address, and then later on can be serve to the users. It also supports the publication of collections onto the LayerG Marketplace.
info
The Asset Management is also available on CMS LayerG for external use.
📝Step-by-Step Guide for Managing Collections on LayerG
1. List Collections
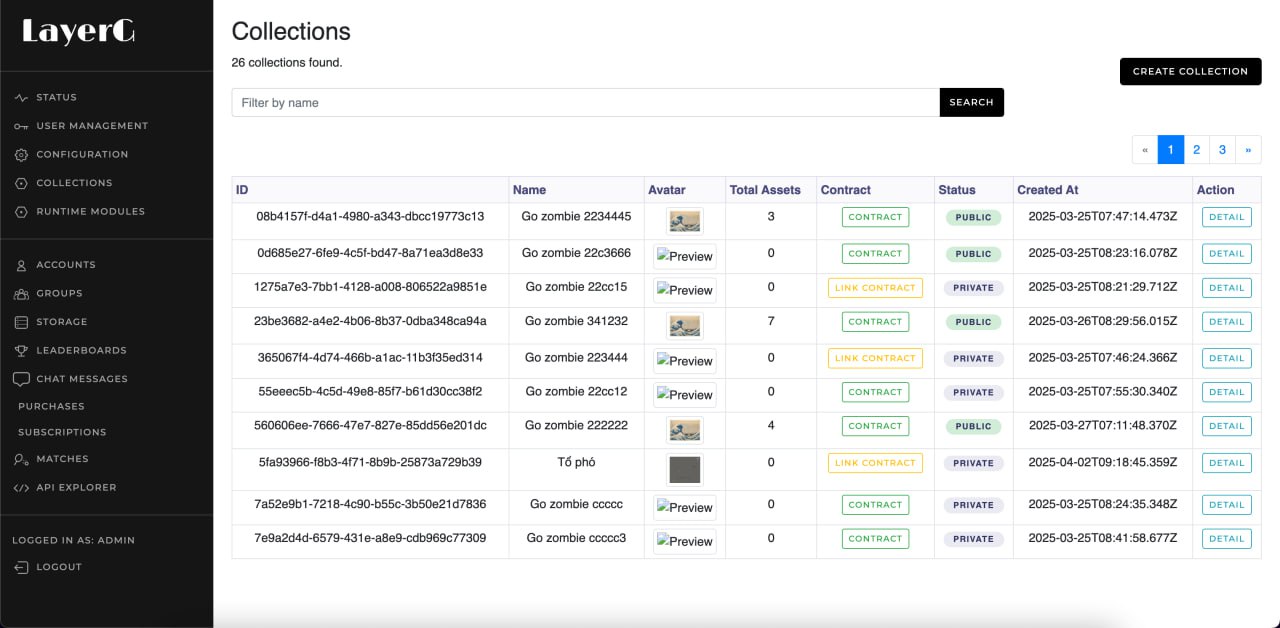
Description:
- Displays a list of all collections the user has created.
- Includes a
Create New Collectionbutton to start a new one. - Basic actions: Detail, Edit individual collections.
2. Create Collection
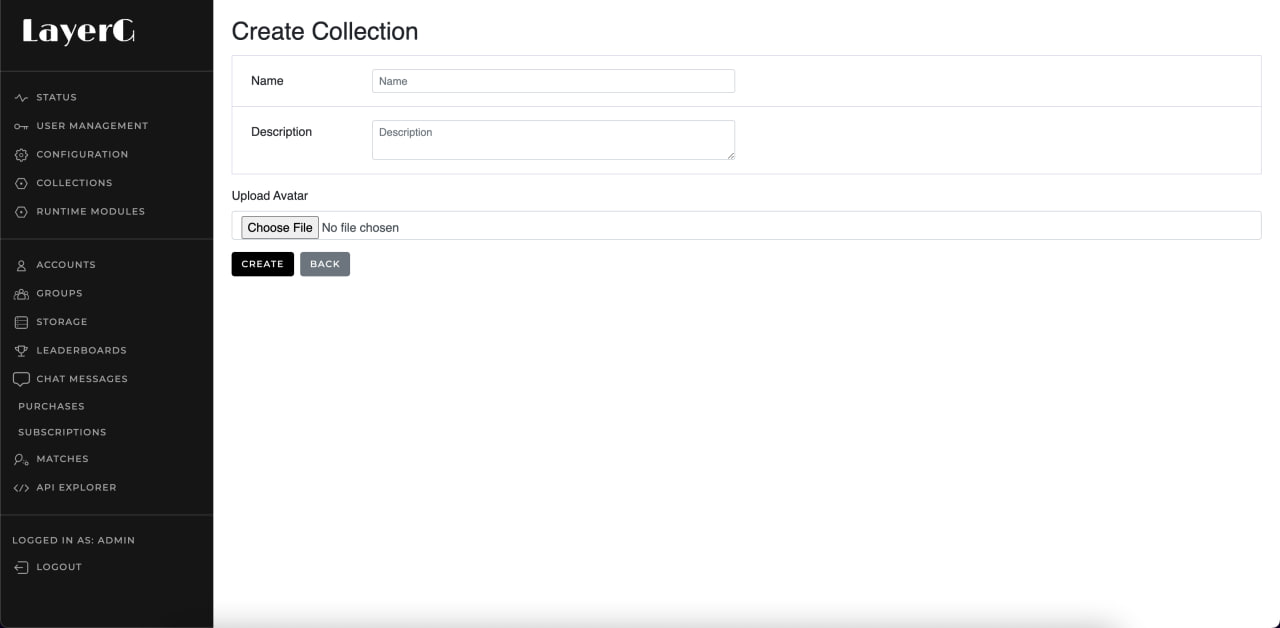
Description:
- Fill in required fields: Collection name, description, thumbnail image.
- Click
Createto confirm and save the collection.
3. Collection Details
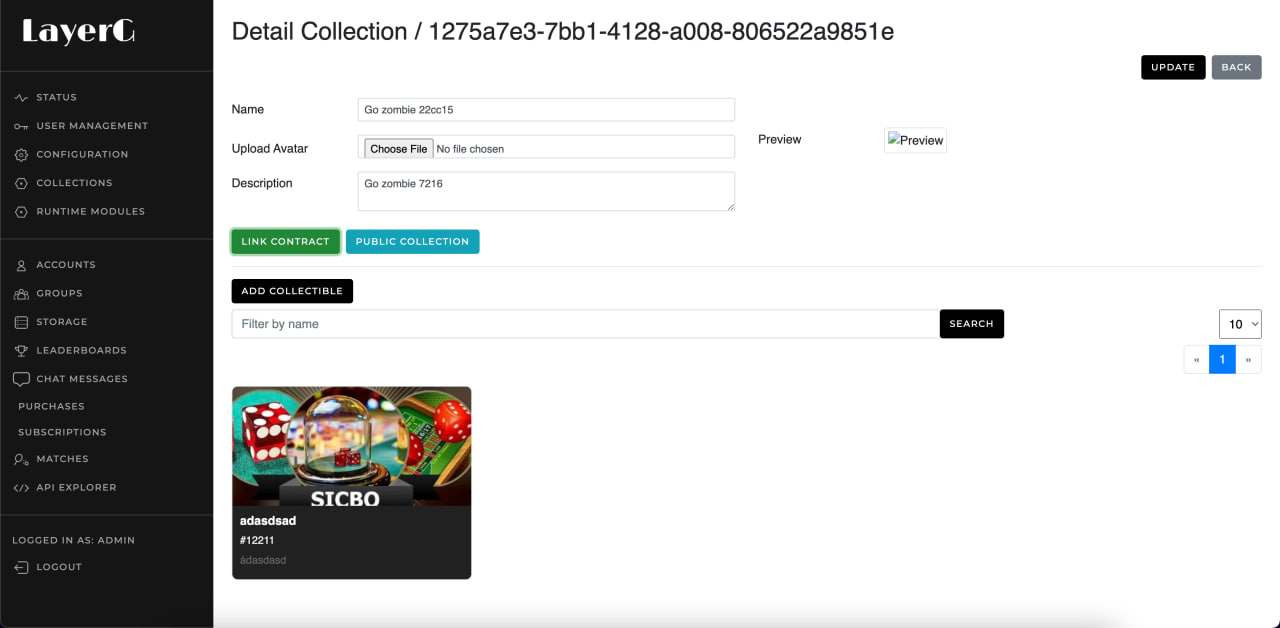
a. Edit Collection
Description:
- Allows updating of name, description, image, or other metadata.
- Includes a
SaveorUpdatebutton to apply changes.
b. List Assets
Description:
- Displays existing NFTs with basic info: name, image, status, tokenID.
- Options to view details or edit each individual asset.
c. Create New Asset
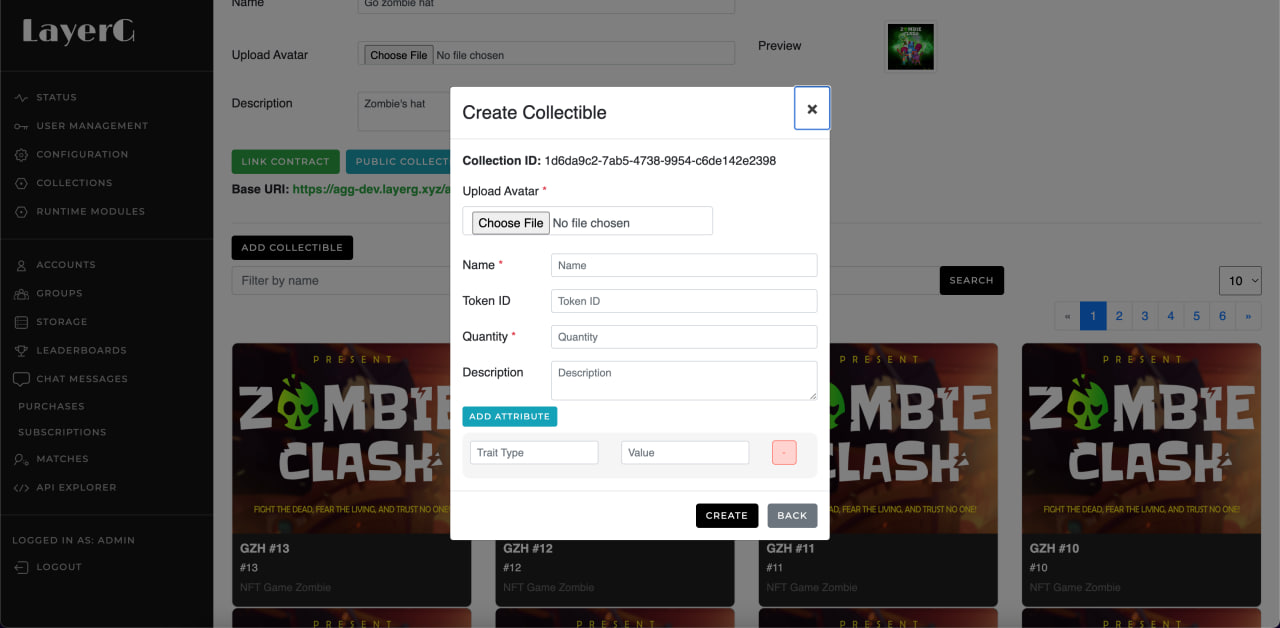
Description:
- Input fields for asset name, image, tokenId, quantity, description, traits, etc.
- Upload asset image or file.
- Click
Createto generate the asset.
d. Update Asset
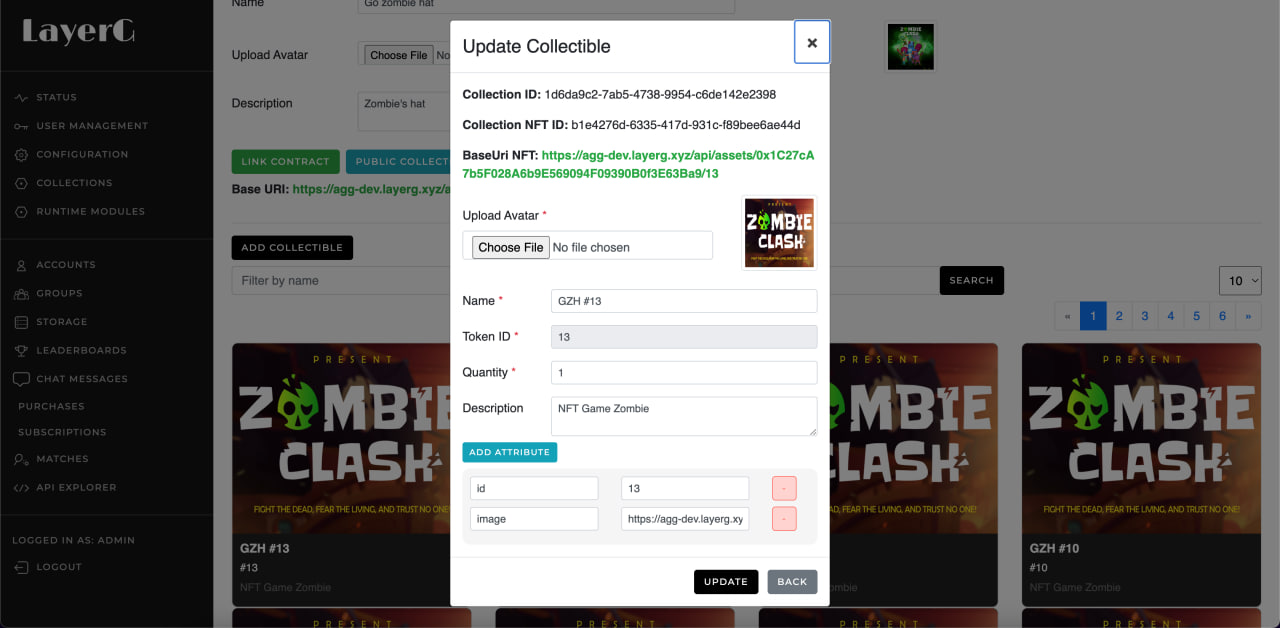
Description:
- Modify image, metadata, or attributes.
- Useful for fixing errors or adjusting info before publishing.
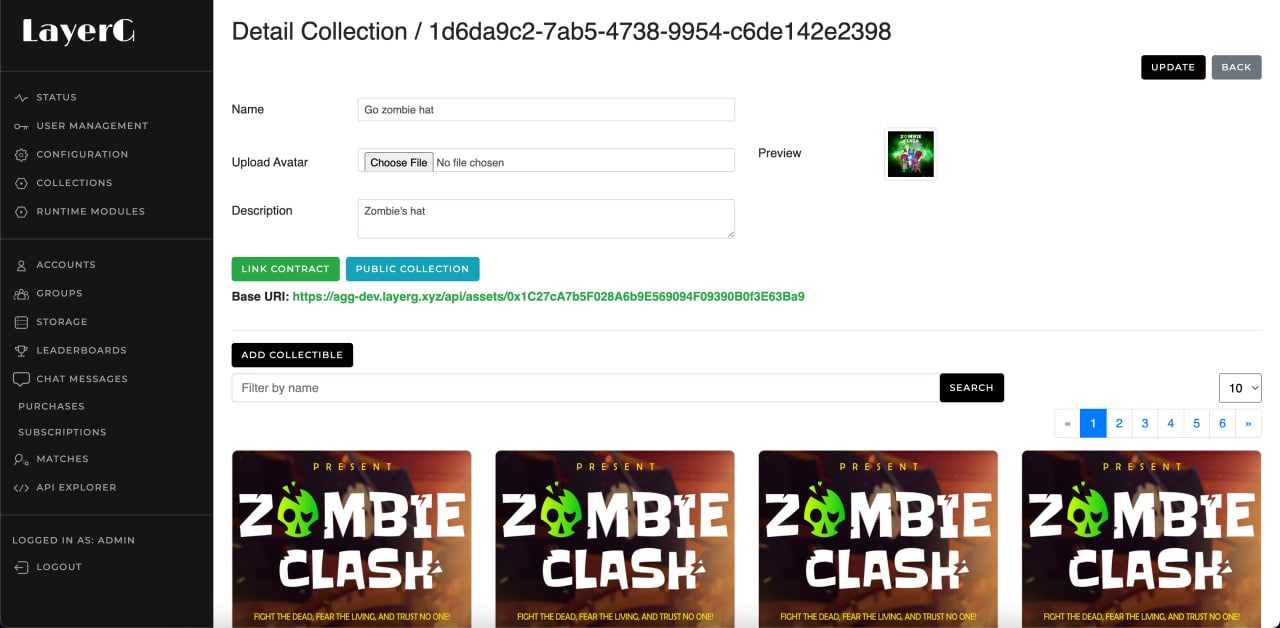
4. Link Contract

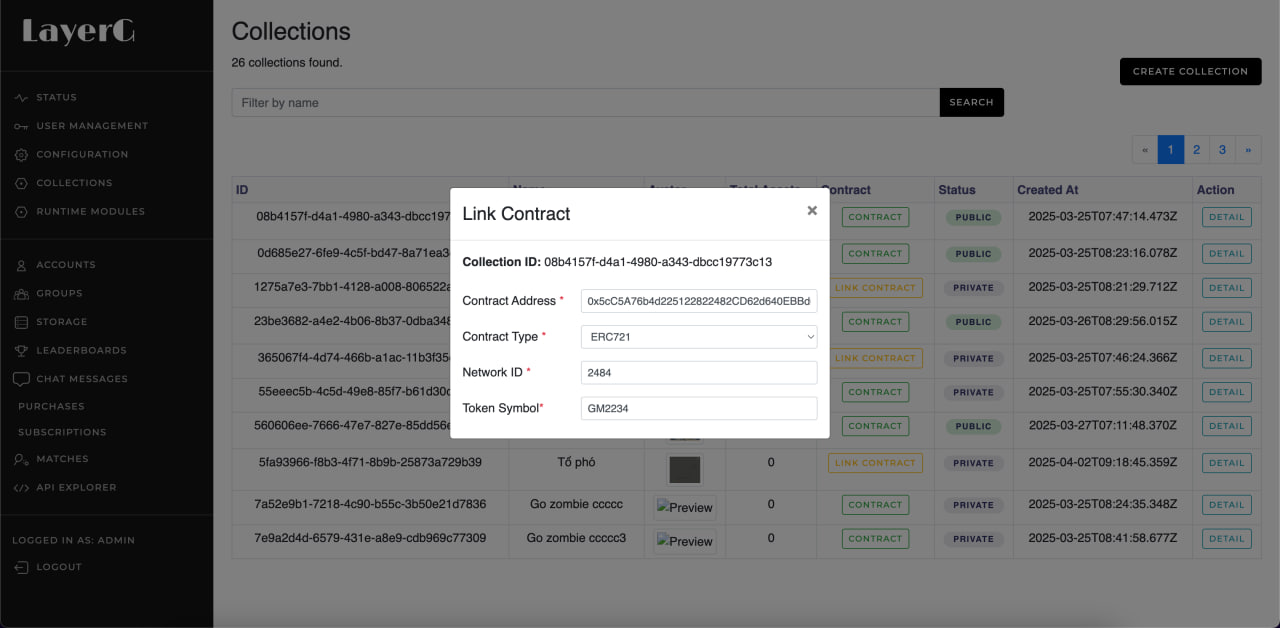
Description:
- Choose to deploy a new contract or enter an existing one.
- Validate ownership of the contract.
- Required inputs: Contract address, type, network, token symbol.
5. Publish Collection to LayerG Marketplace
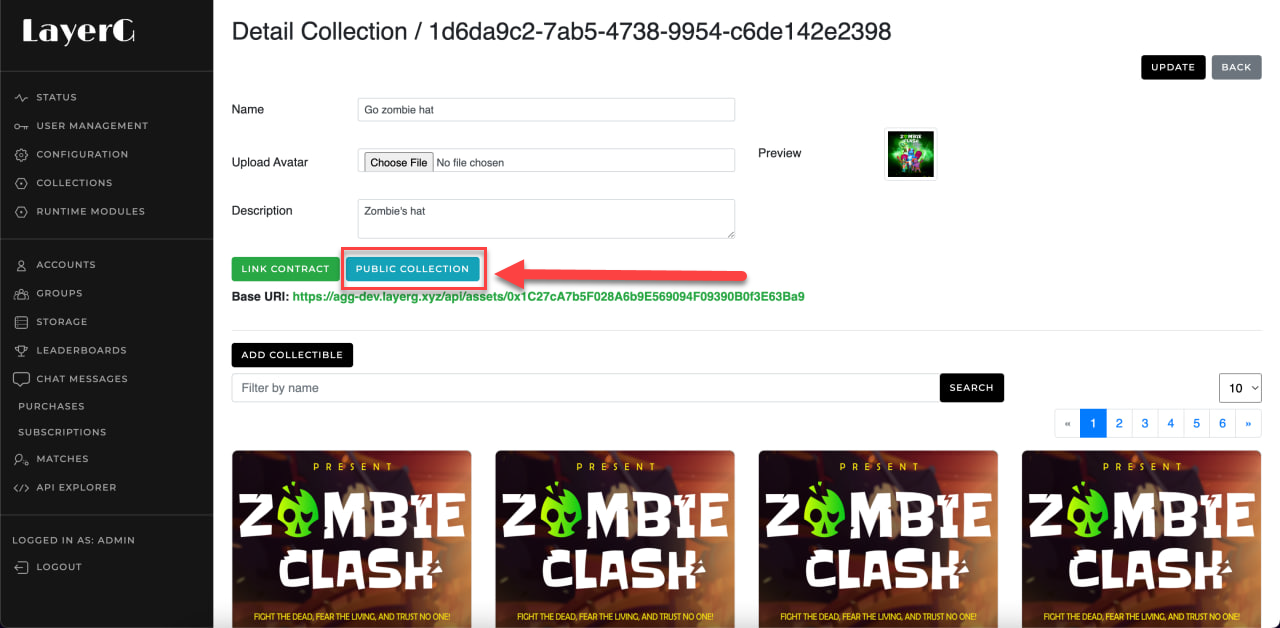
Description:
- Review all collection and asset details.
- This button is only available after
Link contractsuccessfully. - Click
Publishto make it publicly available. - Once published, the collection appears on the LayerG marketplace.